- QR Generator
- Pricing
- FAQ
How to Make a QR Code Photo Album? (Complete Guide)
Creating a QR code photo album is a convenient way to share a group of photos using just one QR code. Here are two effective methods:
Using the Image Component on DeepQR:
- Ideal for a small number of photos. DeepQR allows users to upload up to 3 images for free, with the Advanced plan allowing up to 15 images.
- Log in to DeepQR, select the Image component, upload your photos, and generate the QR code.
Using the Link Component on DeepQR:
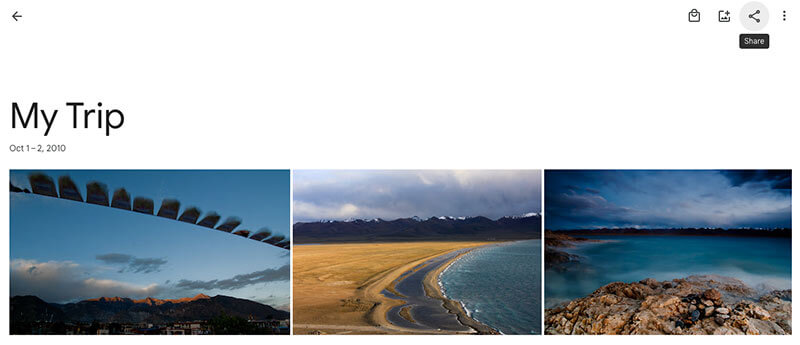
- Suitable for a large number of photos. First, upload your photos to an online album platform like Google Photos, Flickr, or OneDrive.
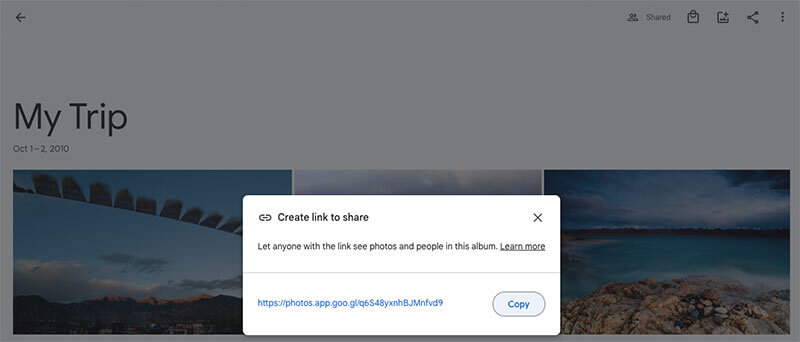
- Copy the album link, log in to DeepQR, select the Link component, paste the link, and choose SOLO mode to generate a QR code that directly accesses the album.
Method 1: Adding Photos with the DeepQR Image Component
When to Use
This method is suitable for scenarios with fewer photos, such as personal photo displays, small family albums, or a limited number of promotional images. It's simple, quick, and doesn't require a third-party album platform, making it ideal for users who need to quickly create and share a QR code photo album.
Step-by-Step Guide
Register and Log In to DeepQR
Visit the DeepQR website and register an account. You can sign up using a Google account or email address. After registration, you get 3 free QR code creation credits (Freemium Plan).
Select the Image Component and Add Photos

On the homepage, you’ll find the QR code content editing area. Click the "Add Components" button to open the components panel and select the "Image" component. The Image component allows you to add multiple photos to one QR code, with different limits depending on your plan:
- Freemium: Up to 3 images per QR code
- Regular: Up to 5 images per QR code
- Advanced: Up to 15 images per QR code
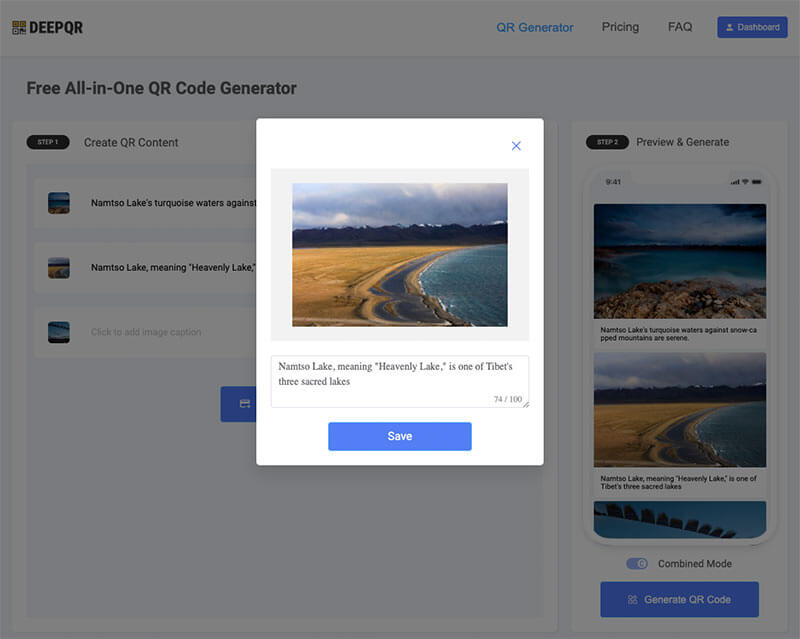
After adding the photos, you can view the display in the preview area in real-time. You can adjust and sort the images, drag and drop to reorder them, and add captions by clicking on the image component. These captions appear below the photos. You can also delete any unsuitable photos at any time, even if the QR code has already been published or printed.
Generate and Download the QR Code
After reviewing the QR code in the preview area, click the "Generate QR Code" button. The system will create a QR code containing all the added photos. You can customize the style, color, and logo of the QR code before downloading it.
Tips
- Ensure the uploaded photos are of clear quality to enhance the album’s viewing experience.
- Utilize DeepQR’s image editing features, like adding captions, to improve the visual appeal of the album.
- If you need to add more photos than the free plan allows, consider upgrading to the Advanced plan for more features and a better user experience.
Method 2: Adding Album Links with the DeepQR Link Component
When to Use
This method is ideal for scenarios with a large number of photos, such as extensive travel albums, wedding photography displays, or corporate product catalogs. Though slightly more complex, it can handle a large volume of photos and allows easy access and management through shared links.
Step-by-Step Guide
- Choose an Album Platform and Upload Photos
- Select an online album platform you are familiar with and trust, such as Google Photos, Flickr, OneDrive, or Instagram.
- Create a new album on the platform and upload all the photos you want to share.
- Ensure the album is set to shareable so you can generate a public access link.
- Get the Album Link
- Find the sharing option on the album platform and generate the album’s sharing link.
- Copy the generated link for later use.
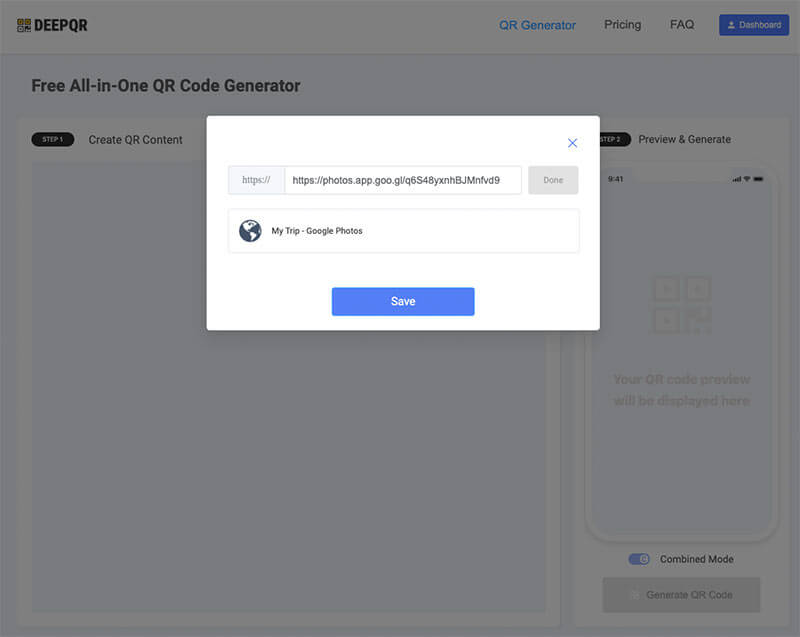
- Select the Link Component on DeepQR and Paste the Link
- Log in to your DeepQR account and click the “Add Components” button to open the components panel.
- Choose the “Link” component.
- Paste the copied album link into the link input box.
- After confirming the correct link, click “Done,” and the system will automatically parse the link. Click “Save” to save the component.
- Select SOLO Mode to Generate the QR Code
- In the QR code preview area, select SOLO mode. In this mode, users scanning the QR code will be directly redirected to the album link.
- Click the “Generate QR Code” button, and the system will create a QR code that links to the album.
- Customize the appearance of the QR code as needed, such as color and style.
- Click “Download QR Code” to save it to your device.
Recommended Album Platforms and How to Get Links
Here are some major album platforms and their features to help you choose the right one:
Google Photos
- Website: photos.google.com
- Features:
- Storage: Free users get 15GB of shared storage with Google Drive and Gmail. Paid users can buy extra storage.
- Photo Management: Powerful classification and search functions, with automatic sorting by location, people, and objects.
- Sharing: Supports link generation with customizable sharing permissions.
- Backup: Automatic backup for phone and computer photos.
- Steps:
- Log in to Google Photos and create a new album using your Google account.
- Click the "Create" button and select "Album."
- Upload photos, then click the share button to generate a sharing link.
- Copy the generated link.
Flickr
- Website: www.flickr.com
- Features:
- Storage: Free users can upload up to 1000 photos or videos per month. Pro users have unlimited storage.
- Photo Management: High-resolution photo and video display, with various editing and organizing tools.
- Community: A large community for sharing and discussing photography.
- Sharing: Supports link generation with sharing permissions.
- Steps:
- Log in to Flickr, create a new album, and upload photos.
- Open the album, click the share icon to generate a sharing link.
- Copy the generated link.
OneDrive
- Website: onedrive.live.com
- Features:
- Storage: Free users get 5GB of storage. Paid users can buy extra storage.
- Photo Management: Categorization and search functions, integrated with Microsoft Office.
- Sharing: Supports link generation with sharing permissions and expiration dates.
- Backup: Automatic backup for phone and computer photos.
- Steps:
- Log in to OneDrive, create a new folder, and upload photos.
- Right-click the folder, select “Share,” and generate a sharing link.
- Copy the generated link.
Instagram
- Website: www.instagram.com
- Features:
- Social Interaction: Primarily a social media platform, ideal for sharing and displaying photos.
- Photo Management: Posting and editing photos and videos with various filters and tools.
- Sharing: Supports story link generation.
- Community: A large user base for interaction and comments.
- Steps:
- Log in to Instagram, create a new story collection, and add photos.
- Click the three-dot menu, select “Share as,” and generate a sharing link.
- Copy the generated link.
Amazon Photos
- Website: www.amazon.com/photos
- Features:
- Storage: Amazon Prime members get unlimited photo storage and 5GB of video storage.
- Photo Management: High-resolution storage and display with categorization and search.
- Sharing: Supports link generation with sharing permissions.
- Backup: Automatic backup for phone and computer photos.
- Steps:
- Log in to Amazon Photos, create a new album, and upload photos.
- Click the share button to generate a sharing link.
- Copy the generated link.
Dropbox
- Website: www.dropbox.com
- Features:
- Storage: Free users get 2GB of storage. Paid users can buy extra storage.
- File Management: Supports various file types with strong sharing and collaboration features.
- Sharing: Supports link generation with permissions and expiration dates.
- Backup: Automatic backup for phone and computer files and photos.
- Steps:
- Log in to Dropbox, create a new folder, and upload photos.
- Right-click the folder, select “Share,” and generate a sharing link.
- Copy the generated link.
Tips
- Ensure Access Permissions: When generating a sharing link, make sure the link’s access permissions are set to "public" or "shared" to ensure proper viewing.
- Choose a Stable Platform: Select a stable and reliable
album platform to ensure photo security and display quality.
- Regular Updates: If you need to update album content regularly, manage photos directly on the album platform without regenerating the QR code.
Choosing the Right Method
Photo Quantity
Small Number of Photos
- Method 1: Using the Image Component on DeepQR
- If you have fewer photos (e.g., less than 15), you can directly upload them to DeepQR using the Image component and generate a QR code.
- This method is simple and quick, suitable for quickly creating and sharing a small photo album.
- Method 1: Using the Image Component on DeepQR
Large Number of Photos
- Method 2: Using the Link Component on DeepQR
- If you have a large number of photos (e.g., more than 15), it’s recommended to upload them to an online album platform, generate a sharing link, and create a QR code using the Link component on DeepQR.
- This method is ideal for displaying a large volume of photos, as one link can access the entire album.
- Method 2: Using the Link Component on DeepQR
Usage Scenarios
Personal Photo Displays
- Method 1 is suitable for small personal photo displays, such as family gatherings or small photo collections.
- Method 2 is suitable for large personal photo displays, such as travel albums or wedding photo collections.
Commercial Promotions
- Method 1 is suitable for small-scale commercial promotions, such as product displays or event photos.
- Method 2 is suitable for large-scale commercial promotions, such as corporate product catalogs or brand promotions.
Travel Album Sharing
- Method 1 is suitable for sharing photos from a short trip with fewer photos.
- Method 2 is suitable for sharing photos from a long trip or multiple trips, as an online album platform allows easy management and display of numerous travel photos.
FAQs
How to Ensure QR Code Scanning Effectiveness?
Choose the Right QR Code Size
- Ensure the generated QR code size is appropriate, not too small or too large, to facilitate easy scanning by phones or other devices.
- Generally, the minimum size should be at least 2 cm x 2 cm (0.8 inches x 0.8 inches).
Maintain QR Code Clarity
- Use high-resolution QR code images to avoid blurriness or distortion.
- Ensure sufficient blank space (quiet zone) around the QR code to improve scanning recognition.
Select Appropriate Color Contrast
- Ensure the foreground and background colors of the QR code have enough contrast, with black and white being the best choice.
- Avoid similar color combinations, like light gray and white, which reduce scanning effectiveness.
Printing Quality
- If you need to print the QR code, ensure high printing quality to avoid stripes or blurriness.
- Use high-quality printing materials, such as high-definition paper or labels.
Test Scanning
- Before official use, test the QR code multiple times with different devices (e.g., various brands and models of smartphones) to ensure it can be scanned under various conditions.
How to Protect Album Link Privacy?
Set Sharing Permissions
- Choose appropriate sharing permissions when generating album links. Most album platforms allow setting different permissions like public, specific user access, or password access.
- It’s recommended to use password protection or specific user access to enhance link security.
Regularly Change Links
- To prevent link leakage or misuse, regularly change the album’s sharing link and update the QR code with the new link.
Limit Access Time
- Some album platforms offer the option to set link expiration dates, controlling the access duration.
Monitor Access
- Use the album platform’s access statistics feature to regularly check link access and handle any abnormal access promptly.
Choose a Secure Platform
- Choose a reputable and secure album platform with good privacy protection policies and technical measures to prevent unauthorized access or leaks.
How to Use the Generated QR Code on Different Devices?
Scanning Devices
- Modern smartphones, tablets, and some laptops have built-in QR code scanning capabilities through camera apps or dedicated scanning apps.
- It’s recommended to use well-known scanning apps like Google Lens, QR Code Reader by Scan, or Microsoft Lens to ensure accurate recognition and scanning effectiveness.
Browser Compatibility
- Ensure the album link can be opened and displayed properly on different devices and browsers. Test with mainstream browsers like Google Chrome, Safari, Firefox, and Microsoft Edge.
- Ensure the album platform is cross-platform compatible, allowing smooth access on Android, iOS, or desktop systems.