Location Component

Component Overview
The Location component allows you to embed a map location in your QR code, providing users with precise geographical information. Whether it’s a store, event venue, or any other important spot, this feature makes it easy to direct people to your chosen location.
Using this component is straightforward. Simply drag the map to find the desired location and save it. The process is highly intuitive, with all settings managed through a visual interface. Additionally, a real-time preview feature lets you see how the QR code will look as you make edits, ensuring the location details are accurate.
Quick Start
Adding the Location Component
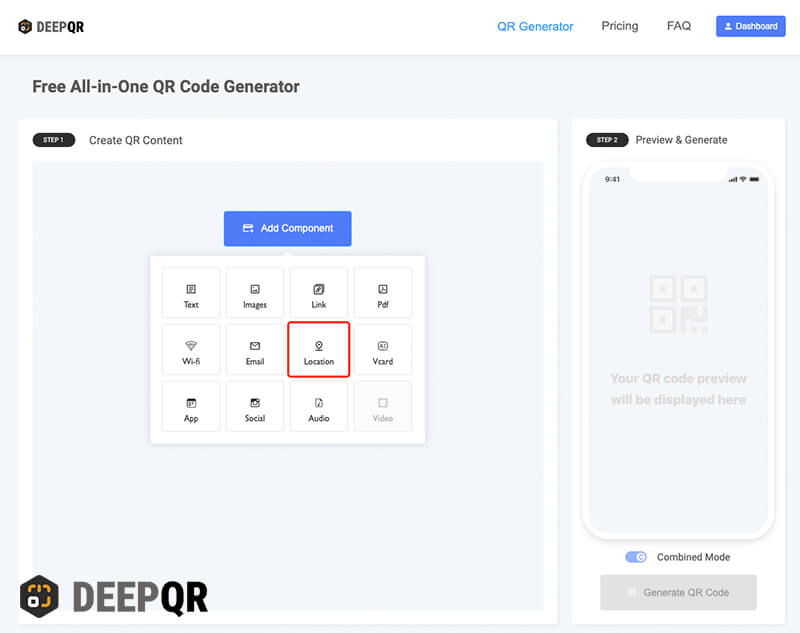
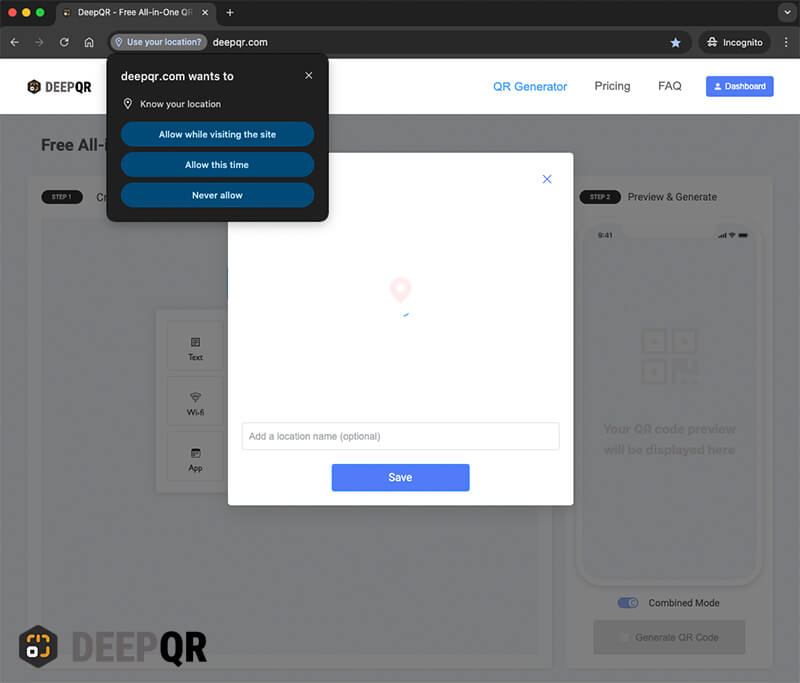
On the DeepQR homepage, click the "Add Component" button and select the "Location" component. This will open the Location Component editing dialog. If this is your first time using it, the website will ask for permission to access your current location. You can choose to "Allow while visiting the site" or "Allow this time" to enable the site to pinpoint your current location. If you’re creating a QR code for your store or restaurant, enabling location access can help you quickly find nearby landmarks. You also have the option to select "Never allow," in which case the site will not access your location, and the map will default to a set location.
Once location access is granted, the map will appear in the dialog. You can adjust the map by dragging, zooming in, or zooming out, just as you would with Google Maps. Since the dialog integrates Google Maps, all operations will be familiar to regular users of the service.
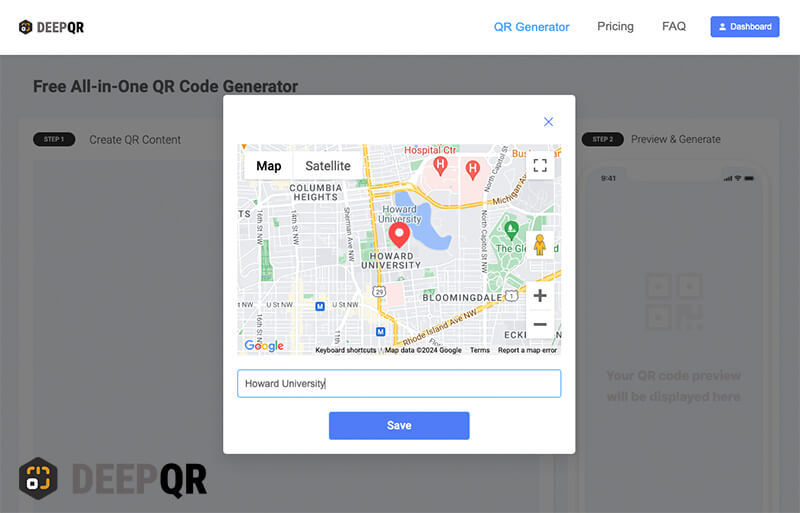
After positioning the map and setting the zoom level, you can enter the location name, such as your store’s name and address, in the field below the map. Then, click the "Save" button to save your changes and return to the main interface. You’ll see the map displayed in the preview area, by default in Combined mode.
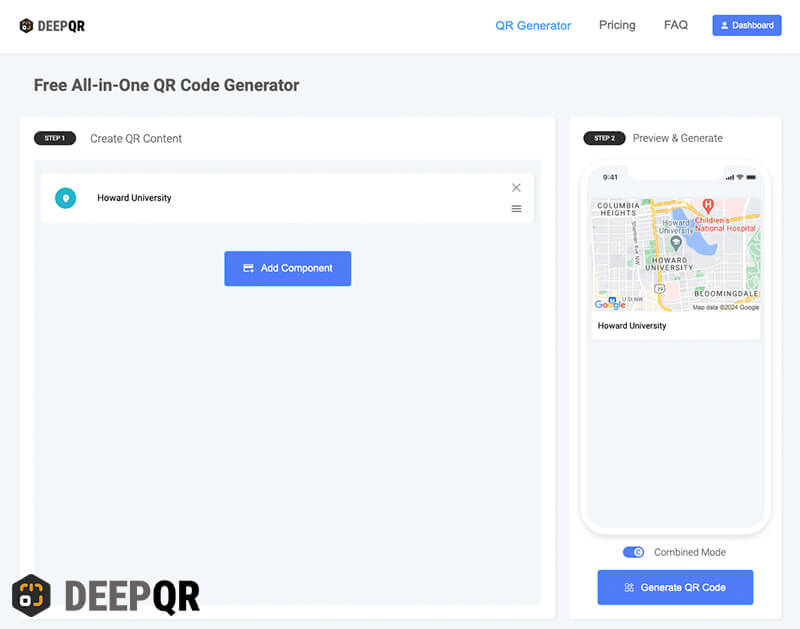
SOLO Mode vs. Combined Mode
By default, the QR code shows the Location component in Combined mode. In this mode, when users scan the QR code, the map component is displayed as a card. They need to click on the map card to be redirected to Google Maps (or automatically to the Google Maps app if it’s installed on their phone). Combined mode is versatile and can be used in various scenarios. For example, you can add photos and descriptions of your store to the QR code, followed by a Location component to make it easier for users to find your location.
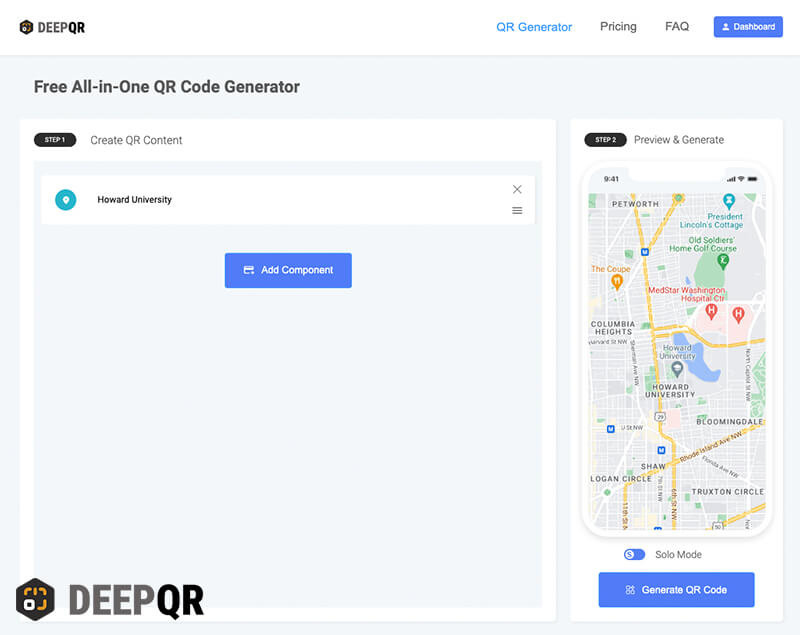
In SOLO mode, scanning the QR code will directly open Google Maps or the Google Maps app and jump to the set location.
SOLO Mode
- Scanning the QR code opens Google Maps or the Google Maps app directly.
- Other components, like text or images, cannot be added to the QR code in SOLO mode.
- The Location Name will not be displayed in SOLO mode.
Combined Mode
- After scanning the QR code, the map component appears as a card. Clicking the card redirects to Google Maps or the Google Maps app.
- You can add other components, such as text, images, or https://deepqr.com/help/link-component/, to the QR code in this mode.
- Multiple Location components can be added to a single QR code.
Component Specifications
Location Name
This is an optional field, with a maximum limit of 100 characters.
Frequently Asked Questions
Do I Need to Regenerate the QR Code After Changing the Map Location?
After modifying the map location, simply save your changes by clicking the "Save Changes" button below the preview area on the DeepQR homepage. There’s no need to regenerate the QR code.
Update Log